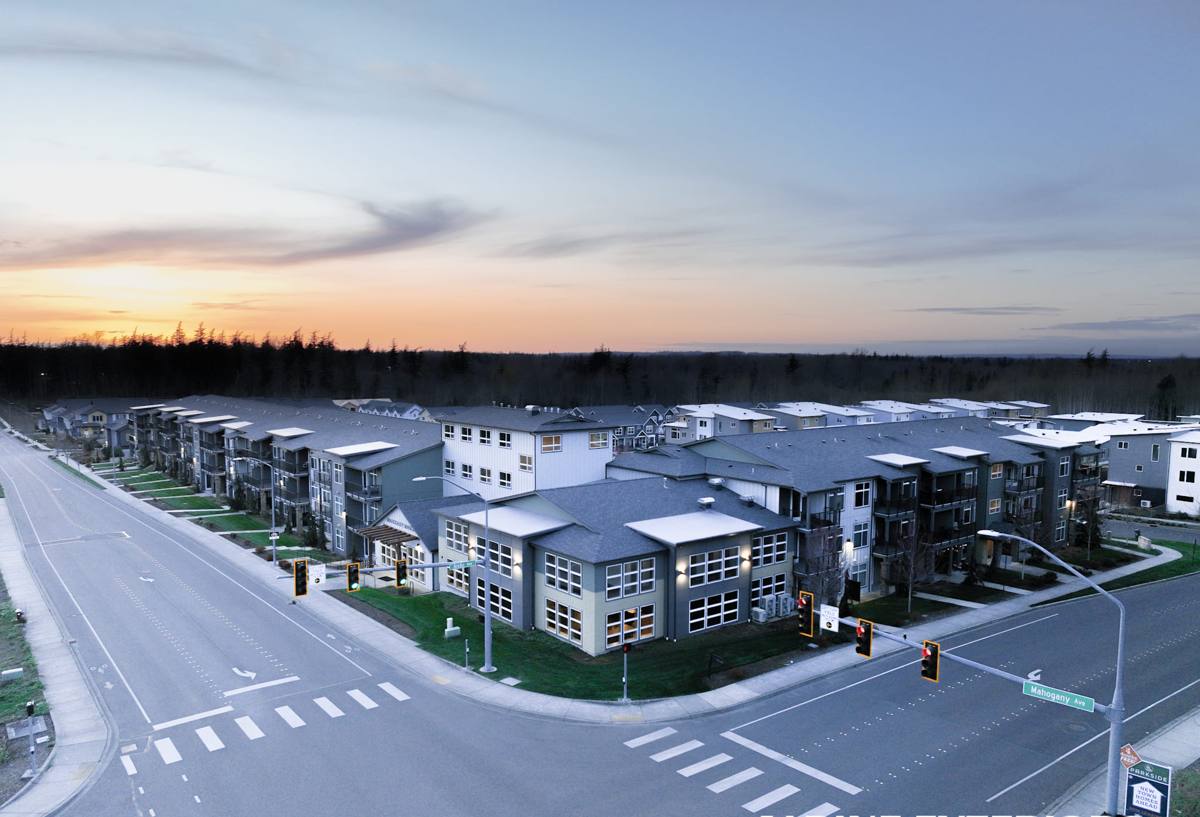
 Chuckanut Exterior
 Board & Batten Siding, Done Right for Mount Vernon
Board and batten has become one of the most requested siding styles for homes in and around Mount Vernon, and it's easy to see why. The bold vertical lines read as clean and modern on newer builds, but the profile also has deep roots in Pacific Northwest farmhouse and craftsman architecture, so it looks just as at home on an older remodel as it does on new construction. What most homeowners don't realize is that board and batten is also one of the least forgiving siding profiles when it's installed by a crew that doesn't understand how this region's weather moves through a wall system. Get the layout, flashing, and fastening wrong, and the same style that looks sharp on day one becomes a maintenance headache within a few wet seasons.
This page focuses on one thing: what it takes to install board and batten siding correctly on a Mount Vernon home, given the climate this area actually experiences, and why we do that work exclusively in James Hardie fiber cement rather than vinyl, engineered wood, or other fiber cement brands.
What the Local Climate Does to Vertical Siding
Homes in this part of Washington deal with a specific combination of conditions that's tougher on siding than people expect. Salt-laden air moving in off the water accelerates corrosion on fasteners, trim, and any metal flashing that isn't rated for it. Driving rain, pushed sideways by wind rather than falling straight down, finds every gap, seam, and undersized flashing detail and drives moisture behind the cladding instead of off of it. And the long stretch of damp, low-light months that this region gets every year creates ideal conditions for moss and algae to take hold on any siding surface that stays damp and shaded.
Board and batten is more exposed to these problems than lap siding in one specific way: the vertical battens create dozens of extra seams and fastening points running straight down the wall, each one a potential path for water if it isn't detailed correctly. A profile with that many vertical joints needs a installer who treats every seam as a water-management decision, not just a design line.
Why This Matters More Than It Looks Like It Should
A lap siding wall might have a handful of horizontal joints that are easy to flash consistently. A board and batten wall of the same size can have several times that many vertical seams. If even a few of those are cut corners — a batten nailed too close to its edge, a missing strip of house wrap tape, a gap left where two boards meet at a window — water gets a direct route into the wall assembly. In a climate this wet, that kind of mistake doesn't show up as a problem in month one. It shows up as staining, soft trim, or paint failure a year or two later, by which point the damage is already behind the siding.
Board & Batten vs. Other Siding Profiles for This Climate
Board and batten isn't automatically the right choice for every home, and it's worth understanding how it compares to other common profiles before committing to it.
| Profile | Look | Climate Considerations Here |
|---|---|---|
| Board & Batten | Bold vertical lines, farmhouse/craftsman feel | More vertical seams to flash correctly; excellent water shedding when installed to spec |
| Traditional Lap | Classic horizontal shadow lines | Fewer seams, very forgiving water-shedding profile, widest color/finish options |
| Shingle/Shake Panel | Textured, cottage or coastal look | More surface area for moss and algae to establish in shaded, damp areas |
| Mixed (Board & Batten Accent + Lap Field) | Lap siding field with board and batten gables or accents | Combines lap's forgiving water-shedding with board and batten's visual interest, often the practical choice for a full elevation |
A lot of Mount Vernon homeowners end up choosing a mixed approach — board and batten on a gable, dormer, or entry feature, with standard lap siding across the main field. It gets the look without turning every wall on the house into a high-seam-count installation. That said, full-elevation board and batten is absolutely a sound choice when it's installed correctly, which is the part that actually determines how the siding performs.
What Correct Board & Batten Installation Actually Involves
The visual result of board and batten siding is simple — vertical boards with narrow battens covering the seams — but what happens behind those boards is where the job is won or lost.
Water-Resistive Barrier and Flashing
Every board and batten installation starts with a continuous water-resistive barrier behind the siding, taped and lapped correctly at every seam, window, and penetration. Flashing at windows, doors, and any horizontal trim transition has to be integrated with that barrier in the correct shingle-lap order — flashing over barrier, siding over flashing — so water is always directed outward and down, never trapped behind the cladding.
Fastening and Batten Placement
Battens need to be fastened into structural framing or approved sheathing, not just through the panel below into open air, and fasteners need to sit far enough from board edges to avoid splitting or pulling loose as the material expands and contracts with temperature and moisture swings. Batten spacing also has to account for the panel width underneath so the reveal stays consistent across the whole elevation — an easy detail to get sloppy on and an obvious one to spot once it's wrong.
Rainscreen Gap
In a climate this wet, a furring strip or rainscreen gap behind the siding gives any moisture that does get past the cladding a path to drain and dry out instead of sitting against the wall assembly. This is one of the details that separates a siding job built for coastal Washington weather from one built to a bare minimum code standard.
Trim and Corner Details
Outside corners, inside corners, and the transition where board and batten meets soffit or foundation trim are the places most likely to fail early if they're rushed. These details need factory or shop-cut precision and correctly bedded caulking or trim flashing, not field-improvised gaps filled with caulk alone.
Why We Install Board & Batten Only in James Hardie Fiber Cement
We don't offer board and batten in vinyl, engineered wood, or other fiber cement brands, and that's a deliberate standard, not an oversight. Vinyl board and batten panels can work loose or warp under the temperature swings and wind-driven rain common here, and their sealed vertical seams give moisture nowhere to go if water does get behind them. Engineered wood products handle moisture differently than fiber cement and carry a different set of installation tolerances and warranty terms that we've chosen not to build our business around.
James Hardie's vertical board and batten system is engineered specifically for this kind of application — non-combustible fiber cement panels and battens, factory-applied ColorPlus finish that resists fading and doesn't need repainting on the same schedule as field-finished materials, and HZ10 formulation engineered for the wetter, harsher climate zones on this side of the country. It holds a factory finish through the driving rain and salt air this region sees, resists the moss and algae growth that plagues shaded, damp walls, and carries a strong transferable warranty when installed to Hardie's specification. That last part matters: warranty coverage on any fiber cement product depends on correct installation, which is exactly why we treat every flashing and fastening detail above as non-negotiable rather than optional.
Our Process for Mount Vernon Board & Batten Projects
- On-site assessment — we inspect the existing wall assembly, current siding condition, and any moisture or moss issues already present before recommending a scope.
- Design and layout — we plan batten spacing and panel layout around your home's actual window and door placement so reveals stay consistent, and we identify whether full-elevation or accent board and batten fits the house.
- Barrier and flashing installation — water-resistive barrier, window and door flashing, and any rainscreen furring go in before a single piece of Hardie siding is placed.
- Siding and batten installation — panels and battens are installed to James Hardie's fastening and spacing specifications, not shortcuts, to keep the manufacturer warranty intact.
- Trim, caulking, and final detail — corners, transitions, and penetrations get finished to shed water on their own, not rely on caulk as the only line of defense.
- Final walkthrough — we go over the finished job with you before we consider it done.
Keeping Board & Batten Siding Looking Right Through Moss Season
Correct installation does most of the work, but a little homeowner attention keeps board and batten siding performing well for the long term in this climate.
- Keep gutters clear so runoff doesn't sheet down the siding face during heavy rain
- Trim back shrubs and trees that keep any wall section shaded and damp longer than the rest of the house
- Rinse off visible moss or algae growth early with a gentle wash rather than a high-pressure spray that can force water behind boards
- Check caulked joints at trim and corners annually and have any cracked or shrunken caulk redone before the wet season
- Watch for soft spots, staining, or paint bubbling near the base of the wall, a common early sign of trapped moisture
What Affects the Cost of a Board & Batten Project
Board and batten typically costs somewhat more than standard lap siding of the same material, mainly because of the extra battens and labor time involved in getting seams and spacing right. Exact pricing depends on your home's specifics, but these are the main factors that move the number.
| Factor | Why It Affects Cost |
|---|---|
| Full elevation vs. accent application | Covering the whole house costs more than using board and batten on gables or entry features only |
| Existing siding removal | Tear-off and disposal of old material adds labor beyond a straight install |
| Wall condition underneath | Sheathing repair or added rainscreen furring adds cost but protects the investment |
| Trim and corner complexity | Homes with more windows, dormers, and corners need more precision trim work |
| Color and finish selection | Factory ColorPlus finishes vary somewhat in price by color line |
Why Hiring a Crew That Already Works in Mount Vernon Matters
Siding installation isn't a one-size-fits-all trade. A crew that mostly works drier inland climates can do a technically fine installation that still isn't built for what happens here — the salt air moving in off the water, the driving rain that hits walls sideways instead of straight down, and the long moss season that follows. A crew that already works this area knows to prioritize the rainscreen gap, the corrosion-resistant fastening, and the flashing details that matter most for this specific combination of conditions, because they've seen what happens on the homes where those details got skipped.
That local familiarity also shows up in smaller ways — knowing how local weather windows affect scheduling, understanding what permitting and inspection expectations look like in this area, and being available if a warranty question or maintenance concern comes up after the job is finished. None of that replaces a correct installation, but it's part of why hiring locally, and hiring a crew that stands behind a single, well-understood product system, tends to hold up better over time than the alternative.
If you're weighing board and batten siding for a home in the Mount Vernon area, we're happy to take a look and talk through what the house actually needs. Fill out the form below for a free, no-pressure estimate.